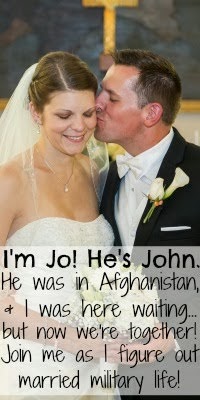
Monday, July 29, 2013

The Easiest DIY Wedding Invites Ever!

Oh boy. Let me tell you, life has been crazy! I was hoping to get more posts out, but things (like my car deciding to lose all power on the highway) have popped up. This week, though, I promise to be much more diligent!

Last week I first wrote about our preparations for our wedding when I posted about our save the dates. Let's talk more about stationary and the wedding today!

Deciding on an invitation was especially nerve-wracking for me because there are so many companies-- brick and mortar or online? calligrapher? DIY? And then there are colors, envelope liners, fonts... You get the picture. For someone who is detail-oriented, it's both exciting and a nightmare.

We finally decided on ExclusivelyWeddings.com. I was originally interested in them because they offered free samples, but I stuck around because the samples were of great quality and the prices were fair.

We used Color Chic in black-- simple and elegant invitations. You can't go wrong with classic (which was my mantra during wedding planning)! Usually ExclusivelyWeddings.com has some kind of sale going, but we were able to order when they had a 35% off code, which turned into a savings of $115. Pretty awesome!

I wanted a black and white wedding with pops of guava, orange, and yellow. During the wedding, those colors would be in the bridesmaids' flowers, on the cake, and in the centerpieces. I wanted the color on the invitations as well, but the pinks that ExclusivelyWeddings.com carried weren't quite our color.... but Michaels carried the exact color in ribbons. Boom. An awesome, easy DIY was born.

You'll need: 
  • stick-on pearls (found in the scrapbook/stickers section of Michaels)
  • a roll of 3/8 inch ribbon
  • self-adhesive dots
  • invitations
Directions:
  1. Cut a length of ribbon that measures double the width of your invitation, plus an inch. (For my invitation, I cut the ribbon into 9 inch segments.) 
  2. Lay the ribbon on the table and place the invitation face-down on top of it. Stick a self-adhesive dot at the end of one of the ribbon ends, and drawing the ribbon as tightly as possible (without bowing the paper), and press the other end of the ribbon onto the adhesive dot.
  3. Flip the invitation over and press a pearl onto the middle of the ribbon.
Check out my very Pinterest-friendly photo tutorial for a visual. (My sister, Rachel, was the hand model. Her extremities are so much prettier than mine!)

And here's the final product (minus some vital information that I erased for the internet version)! We took the RSVP card and envelope and reception card, stacked them, and slid them underneath the ribbon, so everything was in a nice, little package.


Have you seen these other wedding posts?

post signature

Wednesday, July 24, 2013

How We Spent Less than $70 on Our Save the Dates

We're back from our honeymoon! I'm working on getting our apartment in order, but I am so excited to share so many things with you! I couldn't figure out where to start, but after eating some left-over hibachi and thinking for a long time, I decided that the best place to start is at the beginning. (If you don't know about our loooooove story, check it out here.) And the beginning-- other than our love story-- really starts with our save the dates. It was one of the first decisions that we made as a couple for our wedding, and one of the ones we knew we had to make-- we had so many friends and family from all over the country who were invited to the wedding. We had to give them plenty of time to make travel plans!

The wedding industry is very persuasive.  I felt a lot of pressure, especially at the beginning of planning, to conform to all of the bells and whistles all of the wedding magazines, Pinterest boards, and websites were trying to sell me. There are an array of endless, dizzying choices-- magnets, specialty cards that have bracelets and balloons attached, koozies-- but we knew that those didn't fit into our budget and we were committed to being financially responsible.


So, here's how we spent less than $70 on our save the dates: We used Snapfish to create a save the date collage card. Snapfish has a variety of collage choices and a fairly easy online editor.

At the time, John was in Afghanistan, so I designed a few mock-ups, made screenshots of them, and emailed them to him. We went back and forth for about a week, trying to decided which we liked the best, and proofreading... and re-proofreading... and re-proofreading... before we logged our final order. (And, to give credit where it is most certainly due, we used the engagement photos from our fabulous photographer and friend, Andy Colwell.)

This was our final choice:


And here's where I'm super proud of how saving-savvy we were. We bought our save the dates when there was a free shipping code. We completed the transaction through Ebates (which, if you're not signed up for it, you really need to be!) and received $17.36 in cash back through PayPal. 

All told, that means we spent $69.44 on 150 save the dates. We would have saved more by ordering fewer, but I was so nervous about not having enough that I over ordered.  (And now, we have a few extra for our scrapbook.)


Because the cards were 5x7, we could use first class postage on them rather than more expensive postage. All told, we spent a little over $115 for everything... and we loved our save the dates, which is the most important thing of all!
post signature

Tuesday, July 23, 2013

July Sponsor Spotlight and Giveaway

I'm getting back in the swing of things from the wedding and honeymoon! While I'm getting myself situated (so much laundry!) and used to an entirely new state, check out my lovely, wonderful sponsors and enter their fantastic giveaway! There's so much up for grabs!  (And if you're looking for wedding and honeymoon updates, I promise they're coming! Give me a few days and they'll be posted! Promise!)


Meet Victoria from Felicitous Fruition

I'm a 21-year-old Marine Wifey from Seattle, pursuing anything and everything that makes me happy in San Diego! I'm super excited to get settled into this new blog and share my life with you. I keep myself busy during the day and on my blog with beauty and fashion tips, sewing shenanigans, and funny-exciting-so-cute-you-want-to-gag-stories of my loving husband and our spazzy puppy and kitten. Follow along with me, myself and my ridiculous life!  xoxo, Victoria


Meet Jen from Marine Wife, Mommy & Life


Wife to a Marine, mommy to two rambunctious boys and a crazy German Shepherd. Former and veteran Marine, stay at home mom, strong small business supporter. Coffee addict, lover of antique books, coins, guns, football, jewelry and shoes!


Meet Miranda from Hurry Up and Wait


I'm a small town Minnesota gal about to embark on life's greatest journey as a college graduate and Marine wife!


Meet Natasha from Serenity You


Hi, I’m Natasha. I’m mum to 3 cheeky monkeys and love to blog about our daily life, crafts, recipes and a little bit of everything else. My favorite thing to do is read blogs and I often browse Pinterest for hours!!


Meet Natalie from At Home with the Hinkleys


At Home with the Hinkleys is a personal blog to share the life of the Hinkleys (my husband Aaron and I, and the cat Irene).  I write about things that make me laugh, interesting things I hear about on NPR, and all the TV I watch.  


This small town Idaho girl met a small town West Virginia boy, we got married and have been traveling the world with the Air Force ever since!  We have lived in Alabama, Iceland, Japan, and are heading to Germany in Nov 2013.  I'm a labor doula, photographer, substitute teacher, wife, mother, DIY'er, crafter, just to list a few.  I love traveling to new locations, meeting amazing friends along the way, and of course posting all about our adventures!  


Meet Natasha from Natashalh and Natasha's Nibbles and Noshes! 

I love creating things! When I'm not busy with work or my double load of grad school classes, I'm writing, taking pictures, creating items for my Etsy shop, attending craft fairs, and hanging out with my sailor. 


Meet Betsy from Musings of a Museum Fanatic


I am a museum and culture loving, sometimes recipe cooking, fly by the seat of my pants DIYer, always rocking out and just living life kind of blog. 
Come join in on the sometimes crazy and usually unorganized but always fun times at Musings of a Museum Fanatic!


Meet Natalie from Beauty & Brains with Brown Eyes


I’m a 20-something Texas gal living in Aggieland. Right now I’m in limbo between being done with college and getting ready for the next step in my life. I love to cook & bake, so that means I love to eat! I like sports, but basketball is by far my fave. I’m also trying to lose weight (thanks to college) and I’m super duper tall. I say “y’all” all the time and I have an amazing fiancĂ©.


a Rafflecopter giveaway
post signature

Saturday, July 20, 2013

51 Tips for Deployment, Homecoming, & Everything in Between

We're off on our honeymoon! I will be far away from the computer (although I promise I've got a lot of awesome, new posts in store upon my return.) While I'm gone, I've got scheduled posts for you! 

Towards the end of John's deployment, I began reflecting on the past year and wrote a series of posts about everything that had happened and what I had learned from it. I don't pretend to be an expert at deployment or military stuff. I know there are many brave women (and men) who have dealt with the deployment of their loved one many more times than I have (or probably ever will). Instead, I was basically writing posts that I wish someone would have written for me at the beginning of John's deployment.

Surprisingly (or perhaps, not-so), the deployment and homecoming posts have been the most viral posts I've written and the ones I've received the most comments on. The response really was amazing and I am so grateful for it-- it made me feel like a contributor to a community that I previously felt very distant and removed from. I thought I would put these posts all in one place now that John and I will be embarking on a brand new adventure that is considerably more fun and exciting than deployment-- married life!


So here they are, every single informative deployment and homecoming post I've written over the last three months. (If you just have to have more, I may write more... the door's not closed! But for the moment, I am excited to begin sharing all-- and I mean all-- of our wedding DIYs and preparations with you!) Click on the photo for the accompanying article!


post signature

Thursday, July 18, 2013

13 Care Package Approved Recipes

We're off on our honeymoon! I will be far away from the computer (although I promise I've got a lot of awesome, new posts in store upon my return.) While I'm gone, I've got scheduled posts for you! 

I began blogging at the end of August last year. For the first few months, I had a readership of, oh, my Mom.  (I love you, Mom! Thanks!) Suddenly, around December, my readership began to take off (thanks, Pinterest!). So, while I'm away, I'm bringing back some of the oldies-but-goodies that you may have missed if you haven't been reading along since the beginning.


Here's a round-up of all of the recipes I sent John while he was deployed. These are the ones that made it to him, fresh, not smashed into a thousand crumbs, melted, or otherwise inedible. Of course, you can just make them for yourself, if you don't have anyone to send them to!  

Click on each photo to view the recipe! Bon appetite! 


post signature

Monday, July 15, 2013

6 Care Packages Under $15

We're off on our honeymoon! I will be far away from the computer (although I promise I've got a lot of awesome, new posts in store upon my return.) While I'm gone, I've got scheduled posts for you! 

I began blogging at the end of August last year. For the first few months, I had a readership of, oh, my Mom.  (I love you, Mom! Thanks!) Suddenly, around December, my readership began to take off (thanks, Pinterest!). So, while I'm away, I'm bringing back some of the oldies-but-goodies that you may have missed if you haven't been reading along since the beginning.


Care packages are expensive. While I never kept track (and I know, I know, I should have!) of the cost of each full-sized care package, I think mine (including postage) ranged between $40-$60, depending on the contents.

In between the full-sized boxes I sent, I tried to supplement with other creative ideas to help to ease the financial strain. Here are six great ideas that will (no lie!) cost $15 or less (and that's including postage)! Click on each picture for directions and lists of the contents!


post signature