Showing posts with label wedding. Show all posts

Thursday, December 19, 2013

Wedding Ornament Trio DIY


During wedding planning, I ordered a lot of extras when it came to the Save the Dates, invitations, and ceremony bulletins. (I'm pretty sure this is typical, but it makes me feel a bit neurotic to see how much we have left over!) I've kept a few for our scrapbook (which is slowly in the works) and posterity, but there's not too much you can do with 25 extra of anything! 

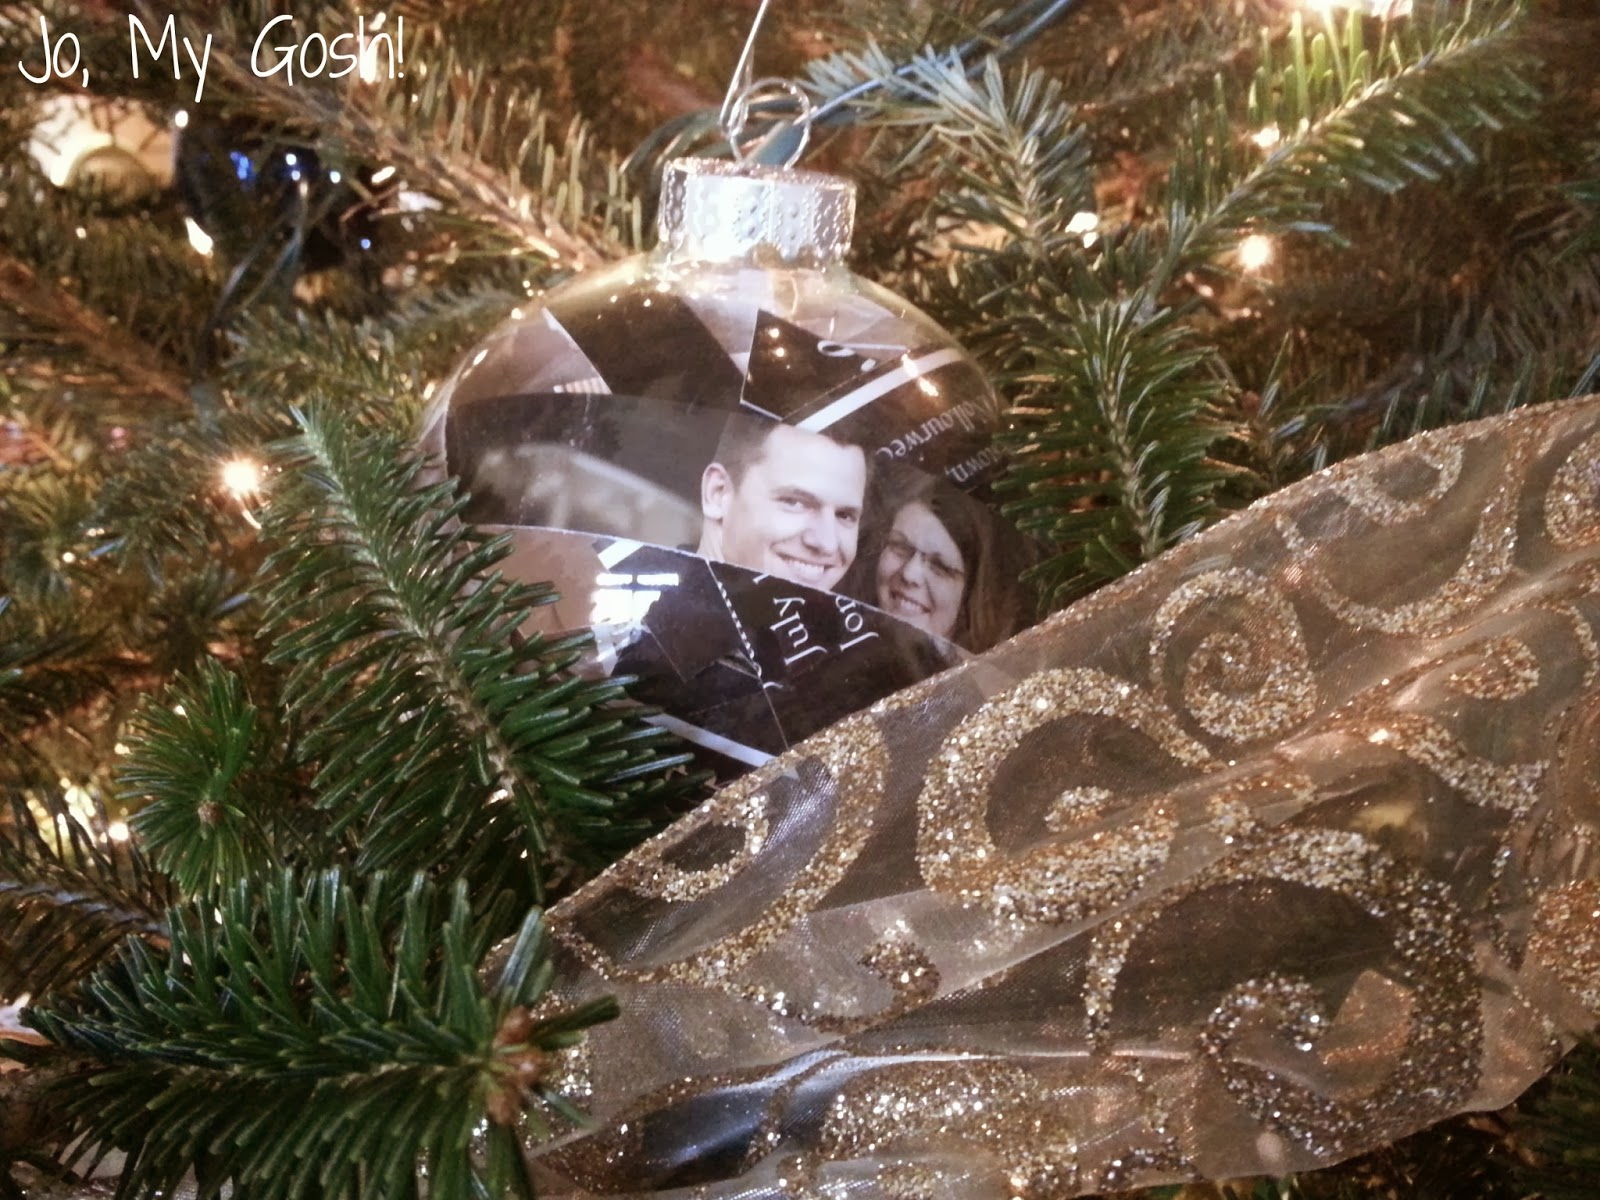
In an effort to not just pitch them all into the garbage (it seems a little unceremonious to me), I bought some glass ornament balls from Michaels, pulled out my very (un)trusty straight-edge cutter, and immortalized our wedding ephemera.

It is quite possibly one of the easiest DIYs ever. I was done with all three in no more than 20 minutes. 

You'll Need:
  • Scissors or a paper cutter
  • ephemera
  • fill-able glass balls
  • ribbon, pearls, or other wedding decor you have left 
Directions:
1. Cut your paper into strips. I varied my sizes so that the wording from our bulletin and invitation could be read. 
2. Using the straight edge of a scissors, slightly curl the ends of the paper strips. 
3. Remove the metal cap and fill the glass ball with paper strips. (Make sure that the strips face out!) If you have ribbons, pearls, rhinestones, or other bits and pieces from the wedding, you can add them once all of the paper has been used.
4. Reattach the metal cap and hang! 


See? Super easy! And cute, too.

Here's our invitation ornament! 


And our ornament using our ceremony program. For this ornament, I cut the strips around the wedding participants so that the names of the people we love are visible on the ornament.


I've got to confess, though. I think my favorite is our Save the Date ornament.


 I can't wait to hang these on our tree every year!


post signature

Thursday, September 12, 2013

100 in 365 Wrap-Up

Last year I created this list of things that I wanted to do while John was gone. Looking over this list, I'm pretty surprised that I got so much done. I'm disappointed with what I read, but in all fairness, I read a ton last year-- just not the books that I said that I wanted to. Go figure! My new list for 2013-14 is residing at the 100 in 365 tab, now. Check it out and see what's on my plate for a new year. Here's what I accomplished, September 2012-September 2013!


Wedding Stuff
1.       Learn how to cardas.
2.      Make centerpieces. (28/25ish) 
3.      Plan a wedding.  
4.      Go to a Bridal Expo.
5.      Find the perfect wedding gown.
6.      Research what we need to set up our house.

Reading
7.      Read the Bible in a year. 
8.      Read Louisa and Marmee.
9.      Read Bossypants.
10.  Read Les Mis.
11.  Read The Count of Monte Cristo.
12.  Read Candide.
13.  Read The Hunchback of Notre Dame.
14.  Read Up from Slavery.
15.  Read The Three Musketeers.
16.  Finally finish the Autobiography of Benjamin Franklin.
17.  Read Deliverance From Evil
18.  Read all of Geraldine Brooks’ fiction. March.  Year of Wonders. People of the Book. Caleb's Crossing.
19.  Read all of Tony Horwitz’s books. A Voyage Long and Strange. Confederates in the Attic. One for the Road. Blue Latitudes. Midnight Rising.
20.  Read This is How You Lose Her.
21.  Read the Age of Miracles. This is the kind of book I want to write. So poignant and beautifully written.
22.  Read American Sphinx.
23.  Read the new JK Rowling book. It didn't change my life, but it was certainly wonderful to read another book by JK. And it gave me hope that she'll be writing and releasing another one!

Health
24.  Run the Baltimore half-marathon. Ashley and I walked/ran it on 10-13-12!
25.  Get to my high school weight and stay there until the wedding, and preferably longer. 
26.  Run or walk another half-marathon in the spring. I ran an 8k with Ashley on 3-16-13! It's not a marathon, but I ran the WHOLE thing and it's gonna have to do!

John’s Deployment
27.  Send John a care package at least once a month. (36/12)
28.  Make John something homemade or handmade at least once a month. (12/12).
29.  Write John a letter every day he's gone. (359/360)
30.  Be at the airport when John comes home for leave.  We said hello on 01-06-13!
31.  Be at the airport when John leaves after his leave. We said goodbye one 01-23-13
32.  Be at the airport when John comes home for good.
33.  Make the cutest sign EVER for when John comes home for good.
34.  Start looking for housing for us when we know John's orders.

Learn Something New
35.  Take French lessons at JHU.  Sadly, not happening this year.
36.  Learn how to cook Thanksgiving, Christmas, and Easter dinner the way Mom does. Thanksgiving.
37.  Re-learn how to sew.
38.  Earn another certification this year. (Pending on program and cost...) Not happening this year.
39.  Study for the GREs (?) and/or start on application materials for MFA or PhD. programs. Not happening this year.
40.  Take a cake decorating class.
41.  Learn how to actually play pinochle.
42.  Learn a new song with Becky while she plays ukulele.
43.  Learn how to make sushi.
44.  Go to the Glass Grill and learn how to blow glass with Becky.
45.  Take a self-defense class.
46.  Learn  the Wobble.

Writing
47.  Write 6 short stories (0/6).
48.  Enter at least 2 more short story contests or submit at least 2 more short stories for publication somewhere. (1/2) 

Making Stuff
49.  Make a Christmas present for everyone in my and John's families. (10/10) (Proof here!)
50.  Make 12 new dinner recipes over the next 12 months. (1/12)

51.  Make homemade marshmallows.
52.  Complete two of the cross stitch wall hangings I bought for our first place together. (2/2)
53.  Make cookies for my students just for fun.
54.  Make a quilt with Mom. Worked on one, but it won't be finished by the end of this year.
55.  If it snows, build a snowman. No snow this year. Sadness.
56.  Make something for the English Department. 
57.  Try to make salted caramels. Here's the recipe!
58.  Make at least two cross stitched Santas for my Santa tree. (2/2)
59.  Cook an entirely organic meal.
60.  Find a delicious recipe for and make fried green tomatoes.

Going Places and Seeing People
61.  Visit VA Beach and Katy at least once this summer.
62.  Go to International Village in PGH this summer.
63.  Attend the church picnic.
64.  Go to as many PSU football games as possible and get a picture with Becky in uniform every time.  And the evidence is here!
65.  Visit PSU on a non-football game weekend. We went while John was home on leave!
66.  Visit PSU on a non-football game weekend. Spent an awesome weekend with Becky on 2/16-18.
67.  Visit PSU on a non-football game weekend. Cheered Becky on in her directorial debut on 2/22-24.
68.  Visit PSU on a non-football game weekend. Blue and White Weekend on 4/19-21.
69.  Visit the BMA.
70.  Visit the Walter's Art Museum.
71.  Meet Ms. Eger for sushi this fall.
72.  See the Cherry Blossom Festival in DC this year. For realsies. I did it! 
73.  Hang out with Lebanon County friends at least once during the summer.
74.  Visit Vicki.
75.  Visit a cute town on the Eastern Shore.
76.  Vote in the Presidential Election.
77.  See Baltimore's Christmas celebration in Mt. Vernon, or have a viewing party and watch it on TV.
78.  Plan a sister's weekend sometime during the school year.
79.  Go to a quilt show with Mom.
80.  Attend and participate in a Holi Festival of Colors in Baltimore.
81.  Hike Mt. Nittany.
82.  Eat at Petite Louis in Roland Park.
83.  Lindsay, Vicki, and Donna at Penn State in August.
84.  Visit Lindsay.

Financial
85.  Do 77 phone interviews for TFA. This is not going to happen since I missed the first round of interviews. New goal: do at least 25 phone interviews for TFA. (24/25) (Ah, so close!)
86.  Shore up my IRA.
87.  Start a new car fund.
88.  Start an apartment/moving fund.

Miscellaneous
89.  Do some kind of nail art thingy.
90.  Do something ridiculous in my classroom (teach without talking, rap, etc.). Lesson with authentic Salem Witch Trials texts, spoke in a goofy, ye Olde Newe Englande dialect.
91.  Read in the bathtub with cookies and candles. On a school night.
92.  Spend election day doing something completely fun that has nothing to do with school.
93.  Play an April Fool's prank.
94.  Go to karaoke with my sisters.
95.  Get Baltimore crabs with my sisters. We opted for sushi.
96.  Go to an author’s book reading either at JHU or the Enoch Pratt Library. Saw Junot Diaz at UMBC on 11/7/12.
97.  Volunteer at the USO at BWI. This was something I thought I had the emotional capacity to do, but I don't think I can be a good, competent volunteer if I cry at every guy in a uniform that I see...
98.   Run the Poetry Out Loud club at my school again this year.
99.  Volunteer for a political campaign (preferably Obama’s).  Phone banked with Shannon on 11/3/12.
100.                      Do 20 random acts of kindness that are out-of-my-way—not just holding a door open, etc. (3/20)


post signature

Tuesday, September 3, 2013

5 Ways to Save Money On Your Wedding


Going into wedding planning, John and I knew that we had to be smart about our wedding budget. I was leaving my job of five years to move to where John's stationed and we'd be making two moves in five months.

Obviously, those things had an impact on our wedding planning. But we both agreed: we wanted a timeless, elegant wedding. The trick was figuring out how to do it on a budget. Here are a few things I learned from 14 months of wedding planning:

Have a plan. It took me a while to decide what I wanted for our wedding, but when I finally made up my mind, I had it figured out to the last detail. I was able to create a plan of action for the most expensive parts of the wedding. I used the weekly 40%-off coupons from Michaels to buy large glass cylinders for table centerpieces. Yes, that meant that I could only buy one a week (although I enlisted the help of my sisters and parents), but it also meant that I was able to buy 28 vases that retailed at $363.72 (before tax) for $218.23. Had I bought these at the last minute, I would have spent $145.49 more.


Pay attention what, where, and when you buy. This includes coupons, sales, websites and stores that aren't typical wedding supply stores. We used Snapfish for our Save the Dates ( and spent less than $70 doing so), ExclusivelyWeddings.com for invitations (and reaped the benefits of buying during President's Day Weekend by getting 35% off our purchase), and Ikea for some of our wedding decorations (read how we saved $190 here). Last summer, I shopped Bath & Body Works on their semi-annual sale and saved 75% on 100 glass votive holders. Scope out clearance racks after holiday and seasonal sales. If you can, buy in bulk-- many stores will give you a discount.

Make what you can. I enjoy being crafty and had a lot of fun making different items for our wedding that would have otherwise cost us much more to purchase. Among many projects, I made and filled pearl-studded wedding rice bags, used ribbon to add a touch of color to our wedding invitations, DIY'ed personalized dress hangers for my bridesmaids, crafted table numbers, and used baby's breath, tulle, and ribbon to make pew bows. Of course, these are just a few ideas-- there are many more floating all over the internet. 


Prioritize your wants. John and I decided early on that we didn't want to have regrets from our wedding, and we made sure to prioritize what was important. Even within those priorities, we were able to make some compromises that helped us stay within our budget. I wanted real flowers, but I didn't mind using ones that were in-season and having smaller bouquets. I wanted a certain style of wedding jewelry for my bridesmaids and myself, but I didn't have to have a particular brand. Knowing what we both thought was "worth it" gave us more wiggle room on some of the less important aspects of the wedding.


Don't be afraid to ask for discounts or special considerations. I asked for discounts from every vendor we worked with, from our photographer to the reception hall to the wedding dress boutique. Because John is in the military, we were able to take advantage of military discounts. But there are more than just military discounts out there. 

Ask about available promotions: depending on when you book the reception hall, they may comp the wedding party's dinners; if you work with the caterer early, you may be able to lock in prices at a lower rate; having your wedding at a time that isn't booked up may yield lower prices for various services. Think about the affiliations you might have: are you a teacher? student? When in doubt, just ask if they offer any discounts at all.

If your wedding vendor offers a package that doesn't quite meet your needs, ask about changing it or what a la carte items cost. When we began working with our fantastic videographer, he offered a package that included a wedding trailer. We didn't need it, but we did want all of the raw footage from the day. He was gracious enough to offer us the raw footage in lieu of the trailer. (And I am so glad that we had a videographer. At the wedding, I was flashmobbed and we would not have a video of it otherwise.) 


Disclosure: This piece was produced in conjunction with a prompt from Credit Card Insider; however, I was not financially compensated for this post. If you're interested in more wedding planning advice, join the conversation here.


Have you seen these other wedding posts?
post signature

Friday, August 30, 2013

How Ikea Saved Us Cash on Wedding Decorations

ikea, save, savings, money, wedding, ceremony, reception, wedding ceremony, decorations, DIY, candles, kohls, michaels, shopping

One of my favorite breakthroughs-- and perhaps the one that I'm most proud of-- during the wedding planning process was taking an inadvertent stroll through Ikea and realizing that so many of the products that we were using for decorations were available at the Swedish superstore... and drastically cheaper than other stores, too!  It was exciting as I loaded up my cart (although returning to Kohl's and Michaels to make massive returns wasn't nearly as exciting later) and realized how much money we'd be saving on our wedding decorations. 

Here, for your perusal, are the items that we purchased and the savings we garnered. 

Hemsjo - A pack of four pillar candles for $1.99. These were just slightly smaller, but I had previously spent $7.99 for a three-pack at Michaels. It was a fantastic feeling taking back the Michaels' candles. 
Savings: $64

Nyttja - A pack of two black picture frames for $2.99. I had bought almost identical black ones from Kohl's for $7.99 each and ended up returning them when I found the Nyttja at Ikea. We bought six frames-- one for each photo of our parents and grandparents' weddings. We repurposed those pictures and frames and created a gallery wall in our apartment-- so they did double duty!
Savings: $30


Sondrum  - One white picture frame for $3.99. We used these to frame our guestbook directions, card box note, and signature drink selections at the bar. Again, I had bought three white frames from Kohl's for $12.99 each.
Savings: $24

Haverdal- One white picture frame for $4.99. We used this 5x7 frame for one of our engagement pictures at our cake table. I had bought a white 5x7 frame similar to the Haverdal for $7.99 from Kohl's. 
Savings: $3

Bumerang- A pack of eight wooden hangers for $4.99. I bought these to make personalized hangers for my  two maids of honor and three bridesmaids. I had a difficult time finding wooden hangers at all; however, the cheapest already personalized ones I could find were on Etsy and were $15 or more. If you're interested in how I made the hangers, check out this post about them! 
Savings: $70

Bonus Find!
Glimma - 24 oversized tealights for $5.99. These are bigger than an average votive, and perfectly fit into the glass votive holders that I had bought on sale from Bath and Body Works. This wasn't necessarily a savings, so much as an exciting find. Previous to finding the Glimma candles, I couldn't find any that were big enough to fill the holders. These were perfect! 


post signature

Sunday, August 25, 2013

DIY Wedding Table Numbers

We're back from attending a wedding in California, and I'm ready to share more wedding stuff with you! Yay! 

John and I met in college, but we only started dating after he was in the Navy. (We do things the hard way. Never the easy way for the two of us.)  Our entire relationship was long distance, so we thought it would be fun to name each table as a place that is important to our relationship. We tried to match each place with a coordinating picture. I don't think anyone noticed, but I set the table numbers up so they told our story-- the first guest table was where we met and the last was where we'll be PCS-ing next, with everything else in between in order.


You'll Need:
  • Microsoft Publisher (or other design program)
  • 5x7 photo paper
  • glue tape or glue dots (I found that the tape works wonders!)
  • 5.5x7.5 scrapbook card stock paper (I found a 100 pack at Michaels for about $8.)


How I Created the Look: 

I created a template using the generic 5x7 paper size on Microsoft Publisher and then dragged and dropped photos and text that I needed for each. (I also used grayscale in the program for the photos, so I didn't have to mess with creating and saving other copies of the pictures themselves.)

After I printed all of the cards, I rolled the glue tape on the back of each one, and centered it and pressed it onto a sheet of cardstock. 

We haven't gotten our professional pictures back yet, so I don't have any clear photos of how the tables looked at the wedding.  However, if you want to create this look for your own, we used small, black easel stands to prop the cards up. (A post about our centerpieces is to follow soon!)


Have you seen these other wedding posts?
post signature

Monday, August 12, 2013

DIY Wedding Ceremony Decorations

Warning: This post is just a cheap excuse to post pictures of our wedding. 


John and I were married in my home church, which is already very ornate, so we didn't have much to do to decorate for the ceremony. The biggest decoration project for the ceremony were pew bows. I just loved them. They were simple, elegant, and added a touch of color without being obnoxious. They took so little time to make, too. 

 You'll Need:


  • 1 1/2 yards of netting per pew
  • 1 yard of ribbon per pew (we used 1 1/2 inch ribbon)
  • 1 bunch of Baby's Breath per pew
  • twisties or clear tape
  • scissors
Directions:


  1. Pull the netting around the top of the pew so that the ends are even with each other. Bunch the netting and pull it together in the middle of the pew. Use a twisty or clear tape instead of a knot to secure the netting to itself.
  2. Using the ribbon, tie a bow around the twisty or clear tape.
  3. To finish the ends of the ribbon: Fold the ends of the ribbon horizontally in half and cut 1/2 inch- 1 inch  diagonal line from the outer corner of the ribbon to the end of the folded edge.
  4. Slip the Baby's Breath into the middle of the knot. 


And here are a bunch of pictures from the ceremony so you can see these nifty pew bows in action. The photos are taken by our photographer, Andy Colwell.


post signature

Friday, August 9, 2013

My Etsy Wedding Jewelry Picks

Jewelry was one of the hardest decisions I made for the wedding, just because I wasn't sure what I wanted. And then, when I knew what I wanted, I couldn't find it. After (no lie) hours of Etsy and Pinterest searching, I found two shops that I couldn't have been happier with.

This is not a sponsored post (none of my wedding posts are). I just want to pass on two fantastic shops to you guys because I am so happy with their products and the glitz they added to the wedding.

My Jewelry

I fell in love with the jewelry set from Be Yourself Jewelry. My dress had clear beading and pearls on it, so I knew that I wanted my jewelry to follow suit. The set even came in white or ivory, which was awesome for my neurosis-- my dress was ivory and white jewelry just wouldn't do. The whole shebang was expensive-- I bought the earrings and necklace as a set and then added the bracelet -- but I felt like a model the day of the wedding. It was worth it.


My Bridesmaids' Jewelry

For my wonderful bridesmaids, I wanted something glitzy with pearl accents. I could not have been happier with the jewelry that Phaness created-- simple, elegant, and it fit so beautifully with their dresses. The owner/designer/creator, America, was so easy to work with. She was very communicative, and almost instantly responded to every single email.  When I received the shipment of jewelry (I also ended up buying my sisters-in-law and honor attendants jewelry from her because I just loved it), it came all pretty-like:

I tried to find a photo of at least one of my bridesmaids wearing the jewelry. None of the ones I have (right now) are close enough to show the detail! Sorry!

Have you seen these other wedding posts?
post signature

Tuesday, August 6, 2013

DIY Personalized Bridesmaids Dress Hangers


Pinterest, while it's really cool, and neat, and inventive and yadda yadda, is also the devil. It makes neurotic, OCD, crazy brides (not unlike myself) have unreasonably insane expectations for everything wedding.  (By the way, have you checked out my new Pinterest wedding board? You totally should! I'm happy to spread the crazy around!)

Through my hundreds of hours spent Pinteresting and looking through thousands of wedding pins, I noticed this very cool, but very expensive, trend of personalized dress hangers. There are many iterations of them-- some of them DIY-- but the pins mostly end at Etsy shops that charges upwards of $15 or more per hanger. 

Is it just me, or is that nuts? Hangers are cool and everything, but I wanted to get my bridesmaids something more meaningful than an artfully crafted hanger.

But, being a slightly neurotic bride, I still wanted the hangers for those cute "before getting ready" photo opportunities.

Not to mention, I knew that my girls would think the personalized hangers were cute.   I wasn't sure how I was going to DIY these bad boys.

And then a trip to Ikea happened.

Did you know that Ikea sells painted, wooden hangers? For $4.99 for an 8-pack?  They do. They're called Bumerang. I bought in white,  but they also have them in natural wood, grey/brown, and black. Essentially, they can match any wedding color palette.
You'll Need:
  • Letter stickers (I bought mine from Michaels, from the scrapbooking sticker section. These are heavy-duty stickers that are plastic-backed, rather than paper-backed with rhinestones and glitter.)
  • Ikea hangers
  • 8 inches of 3/8 inch ribbon per hanger
Place the stickers where you want them to be, add titles if you're so inclined, and then tie on a ribbon to add a little pizzazz and color! 

My hangers each cost about $2, and that's a generous estimate. I love the way they turned out (even though we forgot to use them the day of the wedding)!


Have you seen these other wedding posts?
post signature


Monday, August 5, 2013

Pearl-Studded Wedding Rice Bags


Today's wedding craft is so easy, that I am almost embarrassed to post it. However, in my last year of checking out wedding magazines, websites, and Pinterest boards, I haven't seen this idea pop up anywhere else, so I wanted to share it with you!

You might remember that our wedding palette was black with pops of guava, yellow, and orange. I also used pearls as a theme (which you can see evidence of in our wedding invitations). These rice bags were a small detail, but one that I really enjoyed designing and making because they drew the elements of our wedding together. Not to mention, it was something that John was able to help me with when he came home! Win all the way around!


You'll Need:
  • craft bags (found at Michaels)
  • stick-on 3/8 inch pearls (found at Michaels)
  • wildlife-safe wedding rice (found at Michaels and at Amazon)
  • tablespoon
Directions:
  1. Measure out one tablespoon of rice into each bag. 
  2. Fold the top of the bag down and crease.
  3. Press a stick-on pearl onto the middle of the flap to secure.

Have you seen these other wedding posts?

post signature